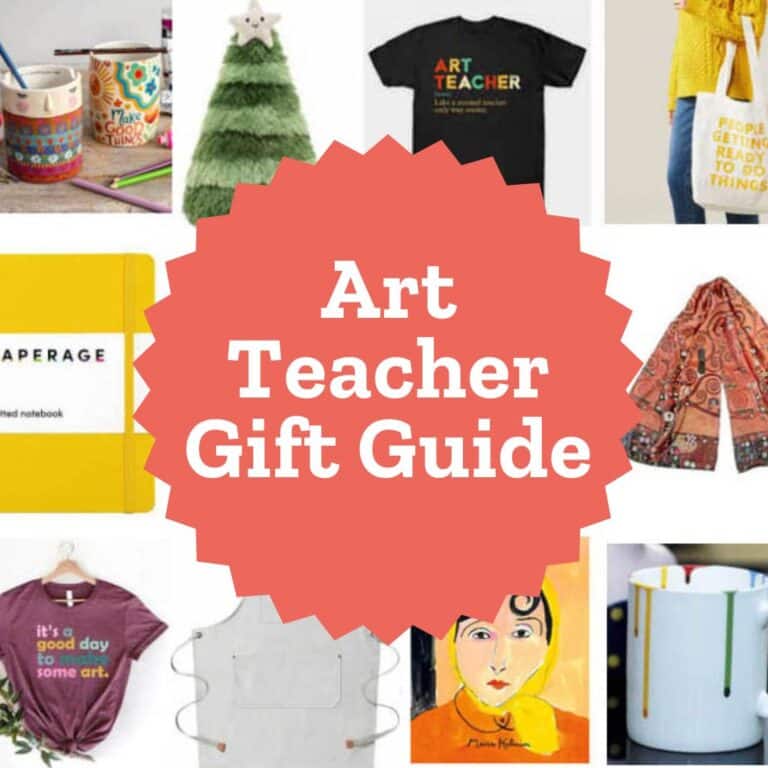
Showing newest posts with label journal. Show older posts

Aug 16, 2010

Art Journaling 120

Tissue paper not only comes in solid colors, but in multi-color sheets too. I found this madras tissue paper at my local Michael’s store.
1. For my city-slicker students, I like to start with an overview of some common leaf names and shapes so they become more aware of the variety that exist. To start their project, they need several sheets of madras paper cut into approx. 6" squares. If they fold the squares in half, they can cut symmetrical leaves of all shapes and sizes. I always encourage straight cutting without drawing to eliminate pencil lines and eraser holes.
2. When enough leaves have been cut out to fill the paper, the students take 50/50 water and white glue, and wet the entire paper. The cut out leaves are placed gently on top. More solution may be brushed on the tissue to get the entire leaf wet. Some color bleeding may occur. Let the leaves dry completely.
3. I used a bronze marker pen to trace the edges of the leaves and draw veins inside. More line drawing leaves may be added in extra spaces. Lastly, names of each leaf are written around the edges.

Jun 2, 2010

Art Journaling 129

This is a mix and match collage project, with a writing prompt that hopefully sparks some creative thinking.
Prep Work: I’ve found that students can get easily distracted if you give them entire magazines to search through, so I tore out two sets of pages for them. One was just a collection of large faces, and the others had large swatches of color or pattern to use for the top of the head. Fashion magazines worked best for the first group and architecture or home decor for the second. Lastly, I cut the U-shaped faces and necks out of manila paper, and had writing paper cut to 6" x 9" for the background.
1. The students started with gluing the writing paper on the journal page, then gluing the manila face and neck on top.
2. The magazine pages with faces were passed out, with several for each student. They were asked to cut out and glue eyes and a mouth on their faces, hopefully each from a different magazine page.
3. The magazine pages with the patterns and color were passed out, with the instructions to cut amd glue some kind of hair or hat or topping to their collage head.
4. Using the lined paper, the students were asked to write and finish the sentence “Hello, my name is _____.”
This page was made by Ayala, a first grader, who happens to have beautiful head of red hair herself. I love it Ayala!

Apr 28, 2010

Art Journaling 128

One of the journal page ideas that I really like is having a pattern of writing in the background of a drawing. With my class full of kinders and 1st graders, I'm finding that they really can't write that much, so starting with a magazine page full of type is a good substitute.
1. I prepped by collecting type only magazine pages, and trimmed them down to easily fit within our journal pages (6" x 9"). The students used ink pens to trace a body template, and then Sharpies to write things around the outside about themselves.
2. When the writing was done, I demonstrated how the students could take watercolor pencils, color a band of color around the body, and then paint with water to make soft edge.
3. When complete, I had some cool colored tape the students could use to attach the art to a journal page.

Apr 13, 2010

Art Journaling 127, Draw an Elephant

Sometimes when I need inspiration for my art journal class, I head to the children's section of my local library. I found "Elephant Moon" by Bijou Le Tord, and fell in love with the poetic story and simple illustrations.
1. The front view of an elephant, as shown in the book, is a nice and simple way to draw one. There are actually just three shapes to my drawing: the center head and trunk, the large symmetrical ears that extend to each side, and then the two front legs right below. I'm going to have my students follow along with me on my board, and then lastly have them add two tusks and two eyes. All are drawn in pencil, first lightly and then traced more heavily.
2. I'm going to have the students write something about elephants in their leftover space before they paint. Maybe with prompts like: "Elephants are..." and have them finish the sentence.
3. I painted my drawing with my usual dissolved Crayola watercolor tablets in a bit of water. I had a supply on hand that were all on the light side, which actually matched the art in the "Elephant Moon" book pretty well.

Mar 31, 2010

Art Journaling 126

My young journal students seem to work best with multi-step projects, so this stamp, trace, write and color page kept them busy for most of our 60-minute class. Plus, I love the irregular pattern that the watercolor makes.
1. Save your paper towel and toilet paper rolls, because they make great disposable stampers, using watercolor paint. I had a theme of "blue" going for the day, so I filled small bowls with a little watery paint for students to stamp circles on their journal pages. A paper towel dabbing then dried the pages pretty quickly.
2. Using a gel pen, the students were asked to trace around both sides of the circles they made, taking care to follow all the wiggly edges.
3. Using the gel pens again, I had the students brainstorm on all the different colors of blue they could think of. Newly made up words were encouraged.
4. The students used a colored pencil to fill in the area around the circles. Dark coloring was encouraged to create a lot of contrast. Lots of variations of this process are possible.

Mar 11, 2010

Art Journaling 125

I finally had a chance to try printing with bubble wrap, and loved how it worked in my art journal class this week. There were so many colorful variations of my sample shown here.
1. I cut panels of bubble wrap that were smaller than the journal pages so that the paint wouldn’t go all the way to the edges. The students were given a brush, acrylic paint and paper plate. After spreading the paint out on the plate, the bubble wrap was pressed into the paint (bubble side down) and then printed in the center of a blank journal page.
2. After a successful print was made, the students pressed a paper towel on top of the page to absorb any extra paint.
3. When the paint felt dry, the students used colored pencils to color in the bubbles. I love how they look like marbles all lined up in a row.

Mar 3, 2010

Art Journaling 124

A simple stamping project worked really well in my afterschool art journal class today. The theme was “Circles”, which some kids turned into faces, some into flowers, and some into sports images, as in this example.
1. I had saved all the center cardboard rolls from my paper towels for quite some time, and found they were the perfect disposable tool to do some quick printmaking. The students dipped them in about 1/2" of liquid watercolor, and did some repeated stamping onto their papers. When the page was full, they gently placed a paper towel on top to soak up extra paint.
2. The paper dries pretty quickly, so I passed out pencil crayons and told them to just be creative with coloring them in. One student even made what looked like a really beautiful wedding ring quilt pattern by overlapping all her circles. Love their creative minds!

Feb 16, 2010

Art Journaling 123; Draw a Textured Castle

I tried this drawing out about a week ago in my after school journal class and was really happy with the results. The boys got into the designing of their castle, and some girls went in the princess direction. Either way, doing a follow-along drawing and adding texture kept them focused and engaged for the entire class.
1. I found directions for drawing a castle here, and had the students follow as I drew it on the board. I encouraged them to draw large enough to fill the paper. They started in pencil and then traced the edges with a thin black marker.
2. I passed out sheets of small white gum labels that I found at the drug store for about $5. The kids were instructed to apply the labels in a staggered manner to look like stone blocks.
3. They then colored in their castles with colored pencils or crayons, rubbing over the labels. The labels were a fun and easy way to add texture to their drawings. Lastly, they colored in the sky and ground and added their ever-important dates and titles.

CA Visual Arts Standard: Creative Expression, Grade One
2.1 Use texture in two-dimensional and three-dimensional works of art.

Feb 9, 2010

Art Journaling 122, Valentine’s Day

I plan to do this page layout tomorrow with my afterschool art journal class. It involves layering crumpled tissue paper shapes with watery glue. I like how it looks somewhat like a poor man’s rice paper.
1. I folded and cut out some red tissue paper hearts, and glued them down to my paper with some dabs of glue stick.
2. I mixed up some glue and water until it was about the consistency of milk, and sparingly brushed it over my entire paper.
3. After crumpling up some large squares pink tissue paper, I smoothed them out and pressed them over the hearts. More glue was brushed over the top layer. The goal was to leave just a few wrinkles to give the paper texture. I continued until the entire paper was covered.
4. I think it will take a half hour or so for the page to dry, so I plan to have another coloring project to work on in the meantime. When dry, red Sharpie markers are used to add decoration to the hears, and also some Valentine-like messages. The glue-like finish makes for a nice drawing surface for markers.

Jan 23, 2010

Art Journaling 121

This is a quick bonus project I used in my last rainy-day Art Journal Class. I’m always on the lookout for ways to layer art, and these tissue paper rain drops worked really well.
1. As an intro, I asked all the students to make a border around a new page. Could be straight, scallop, zig-zag, anything to add a little more interest. After the pencil lines were done, they were traced with a thin black marker.
2. I asked the students to write a quick paragraph about rain, whether they liked it or not, and what memories it might bring. A title was added to the top, something large and decorative. Young students could just right the word rain on their page in big fancy letters.
3. I had cut out a lot of tissue rain drops beforehand as the paper can be a challenge for young ones (you have to cut lots of layers at a time). These were passed out to each student. I foresaw problems with kinders overusing the rubber cement, so I walked around and brushed spots of glue on the pages where they pointed to. The tissue drops were placed on top, where they laid nice and flat.

Jan 19, 2010

Art Journaling 120

I find that students often think that art equals drawing and if they are not good at drawing, they are not good at art. I try to show them that drawing skills come from taking the time to see details, and lots of practice.
1. With a journal or drawing paper, ask the students to trace their hands with a pencil.
2. Once they are happy with their hands, they are to take either a thin marker or pen and draw in as many line details as they can (nails, wrinkles, etc.)
3. Lastly they chose a line pattern and completely fill in the background. The goal is to have them get into a kind of “doodle” trance, which is a great place to be!
CA Visual Art Standard: Creative Expression, Grade Five
2.2 Create gesture and contour observational drawings.

Jan 17, 2010

Art Journaling 119

These umbrellas are cut out from patterned scrapbook paper. It’s raining cats and dogs here in LA so I thought this would be a good theme for my next after-school Art Journal class.
1. I started with tracing different size circles onto the pattern paper, drawing a scallop line through the middle, and cutting each out. I made one large, one medium, and one smaller circle so all my umbrellas would be different sizes.
2. After arranging them on my journal page, I glued them down with a glue stick. Black lines were drawn on each to indicate the spokes, and then handles were drawn underneath.
3. I used a thin blue marker to draw lines of rain coming down, which stopped at each umbrella. Pencil crayon was added to add more color to the background.
4. Most students have heard of the "Rain, rain, go away..." poem, so it is an easy one for them to write somewhere on their page.

Sep 1, 2009

Art Journaling 118

I think my biggest goal for my upcoming art journal class is to have kids embrace the loose, accidental art that can happen when you let yourself just create. Fourth and 5th graders especially tend to get more judgmental about their abilities, so I hope this un-fussy journal page will let them have some fun.
1. I started by tearing small leaves from tissue paper, and planned out three flowers on each page. Using 50/50 glue and water, I wet the journal pages and arranged the tissue flowers on top. Let dry completely.
2. Drawing with one continuous line, I started at the bottom with a Sharpie marker, traced up and around each petal 2 times, added little loops in the center of the flower, and then drew back down to the beginning point. Small leaves may be added.
3. Using either watercolor or watercolor pencils, paint the background, intentionally leaving white space around each flower and leaf. In fact, the paint should not touch the marker at any point. The extra white adds some extra punch to this colorful layout.

CA Visual Art Standards: Grade Five
2.4 Create an expressive abstract composition based on real objects.

Aug 18, 2009

Art Journaling 117

This is another drawing inspired by the Austrian abstract artist, Friedensreich Hundertwasser. His philosophy about nature is very reflective in his artwork, so I used his quote and love of wavy lines to jump start this journal page.
1. I started by drawing a wavy horizontal line, and then five random circles for the flower centers above it. All the centers had a stem drawn down, then lots of concentric circles around them.
2. When I was happy with the size of the flowers, I drew lots of wavy horizontal lines that imitated the horizon line, and jumped around each flower.
3. After the sky was complete, I added block letters below spelling out one of my favorite quotes from Hundertwasser. With the drawing done, I traced all the lines with a thin black marker.
4. Using colored pencils, I filled in the drawing, using some more coloring ideas from Hundertwasser. The background I colored one color with medium pressure, and then came back over the black lines and pressed harder to shade. The ground and stems and letters were colored with matching colors too keep things readable. But with the flower circles, I let myself try all different kinds of combinations to see what I liked best. I think having some rules like this will keep teachers from getting a lot of half-done pages which have a tendency, in my experience, to not get completed.

Aug 15, 2009

Art Journaling 116

Aluminum foil and Sharpies are at work here, in addition to some extra texture rubbing.
1. This idea comes from “The Usborne Book of Art Projects” book, one of my favorite. I started by taking a plastic net that onions come in, and stretching it over a square of cardboard. With a piece of heavy-duty aluminum foil placed on top, I lightly drew a rainbow trout fish with a pencil. I had help by looking at pictures on the internet, but students could look at colored pictures. The more details the students add, the more colorful their fish will look.
2. When the drawing was complete, I colored in all the rainbow colors of the fish (rubbing to get lots of bumps) and then traced the fish with a black marker. Dots may be added at the end. When complete, all the fish are cut out.
3. I painted the background of two journal pages with watercolor, leaving some sky space on the top. When the paint was dry, I arranged the fish and glued them down.
4. Lastly, I used a silver Sharpie to write a bit about these interesting fish, and added some details to the water too. This process might work well for any report that involves shiny, colorful animals.

Aug 11, 2009

Art Journaling 115

Some of the best art journal pages I’ve seen just seem to just have a sense of freedom to them. I think that’s going to be my number one goal when I take this project to the classroom in a couple of weeks. The paper can be spotty and messy, headlines can go at the bottom instead of the top, and writing can go sideways and even upside down. No worries, just paint and draw and write and have fun!
1. I put a teabag in a few tablespoons of hot water to make some really strong tea. Note: Test the different teas first, a cinnamon type worked much better than Lipton. Using a brush or the wet teabag, smear the paper with tea, leaving some blotches and white spots. Let dry.
2. There are many “how to draw a cat” sites on the internet, but I liked http://i273.photobucket.com/albums/jj220/Sparkythespark/howtodraw.jpg because it seemed appropriate for elementary age students. I drew the cat across the pages with a pencil, and then traced with a brown Gelly Roll pen.
3. My title seemed to fit the best on the bottom right. I made block letters and then shaded in the edges.
4. Lastly, I wrote about my cats in the area remaining, and decided it didn’t have to be horizontal. I made my writing go up and down and follow the shape of the tail. This was a fun page to do and I really liked how the tea spots dried and all the natural colors seem to work together.

Aug 8, 2009

Art Journaling 114

I used two laws of perspective to help give this spread some depth. One is that with distance, similar shapes appear to get smaller, and two is that colors in general get lighter.
1. I started by drawing a horizon line about 2/3 of the way down the page. I drew the road that narrowed with distance, added the trees that got smaller, and the border around the edge.
2. With the lettering, I'm trying to experiment with staggered placement to both loosen up the look and hopefully the students. This journal should be one place where they don't have to worry about keeping things in straight lines. When I was happy with the pencil writing, I traced everything with a black Sharpie, going over the headline letters twice to make them darker.
3. Lastly, I colored in the pages with my favorite Prismacolor colored pencils. I used the lightest shade of green for the distance fields, and a darker for the area that is up close. I imagine two shades of blue could be used for the sky too.

Aug 7, 2009

Art Journaling 113

I started with one of my favorite poems, “The Wise Owl” for this 2-page spread layout.
1. I really love the look of white on dark journal pages I have been coming across, so I splurged on a white DecoColor marker from Aaron Brothers for $3.50. To prepare the pages, I painted them with a dark blue watercolor and let dry.
2. My owl was drawn on the right page copying a magazine image, but I will probably find something simpler when I do this with a class. The point is to have a large bird drawing, with as many feathers and spots and line details as possible.
3. On the left side, I wrote my poem “The Wise Owl”
The wise old owl
sat in an oak.
The more he saw
the less he spoke.
The less he spoke
the more he heard.
Why can’t we be like
that wise old bird?
4. Some stars and dots were added around the pages, with a little yellow oil pastel inside the large stars.

Aug 6, 2009

Art Journaling 112

This is another 2-page art journal spread, this time on the topic of dreaming.
1. I plan to give the students a rectangle to trace, one approximately the size of the shown quilt. They are to tilt it, make it go off the paper, and trace.
2. The head is drawn, along with a pillow and headboard. The quilt may be divided up into smaller squares. A quick heading and paragraph about dreaming are added in the extra space.
3. All lines are traced with a black marker. I filled in all the spaces on the quilt with color and pattern.

Aug 5, 2009

Art Journaling 111

The goal I have for my journal is to fill up every single page, including the left hand sides. This post is an idea for making a 2-page drawing, one that goes across the center spine.
1. I placed my hand across my open journal and traced it with a pencil. Following the same angle of the fingers, I wrote “GOALS” as if extending from one finger, and the words “2009 – 2010 Year of School” below it. I decided to list my top 3 and added them at the same angle. I hope to reinforce to the students that when they write in their journal, they don’t necessarily need to write in horizontal lines.
2. To give texture to the large area on the left, I drew lots crosshatch lines with the Sharpie marker. On the right, all the writing was also traced with a thin Sharpie.
3. Lastly, I colored in the pages with a little oil pastel. My Portfolio brand of pastels are water soluable so if you brush water on top, it looks a bit like a painting.

  © Blogger templates The Professional Template by Ourblogtemplates.com 2008

Back to TOP