Easy Artist Trading Cards Ideas for Kids
Below you’ll find lots of ideas for Art Trading Cards for kids. Sometimes called ATCs, they are miniature works of art, made on a card the size the a typical trading card (2.5″ x 3.5″).
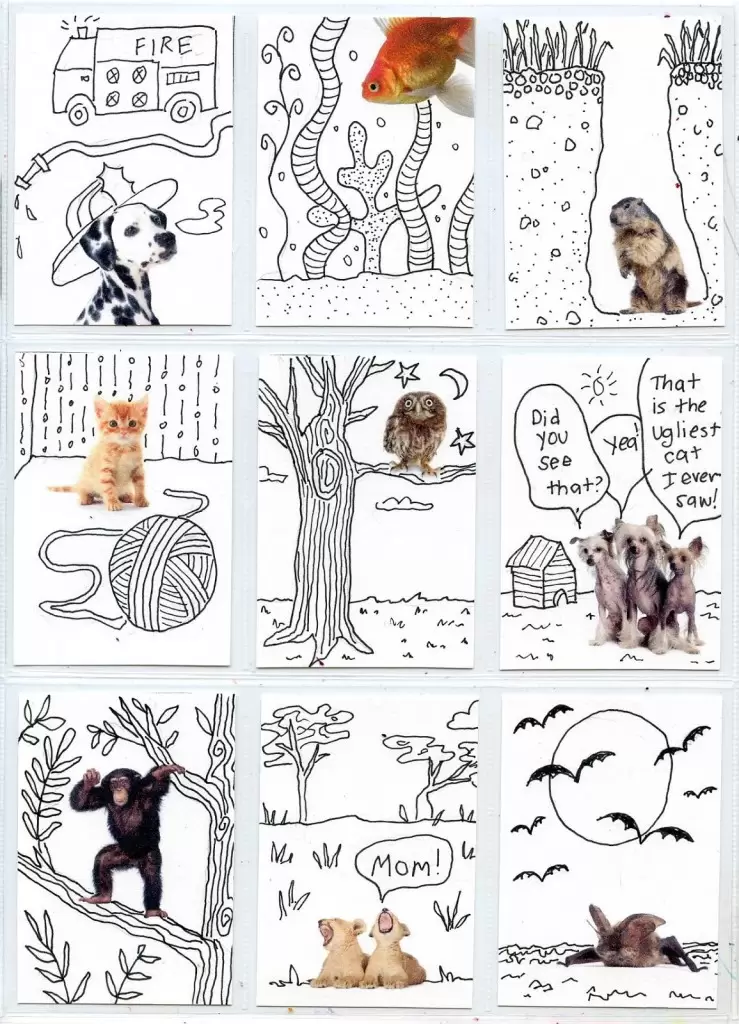
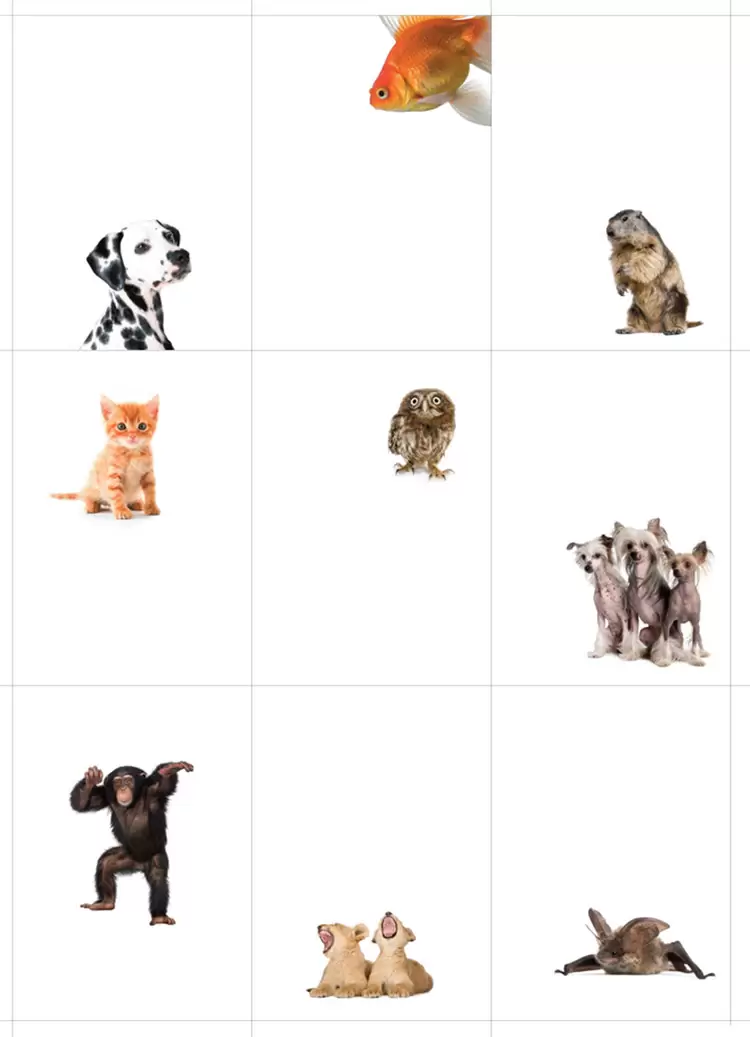
Finish the Photo ATC Project
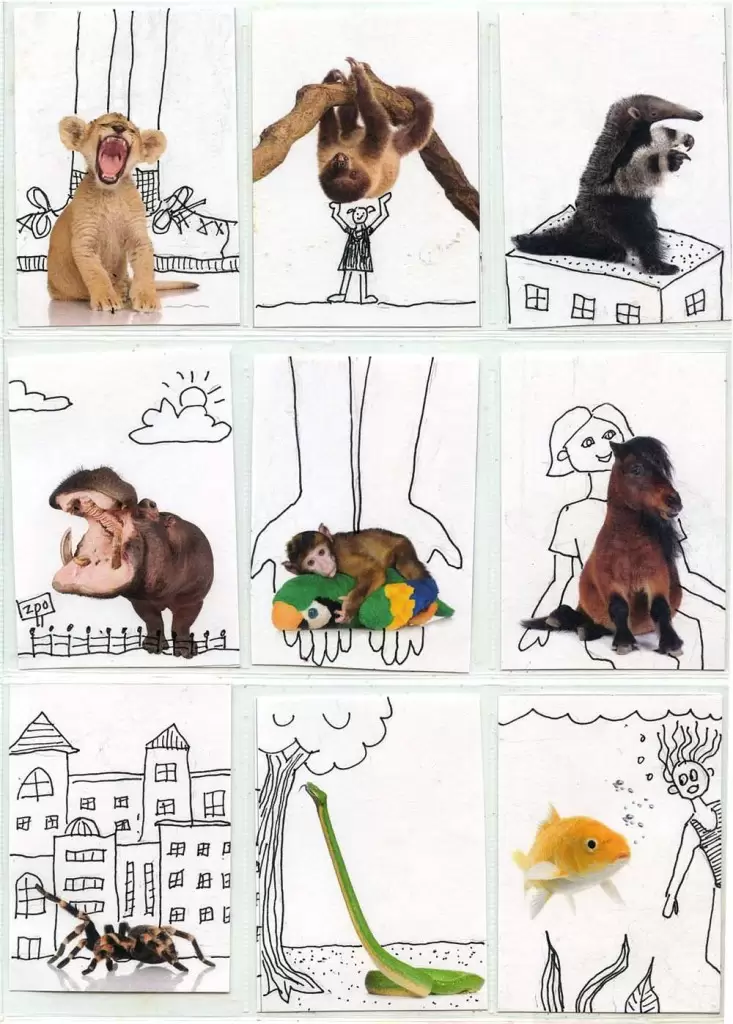
Finish the Photo Two ATC Project
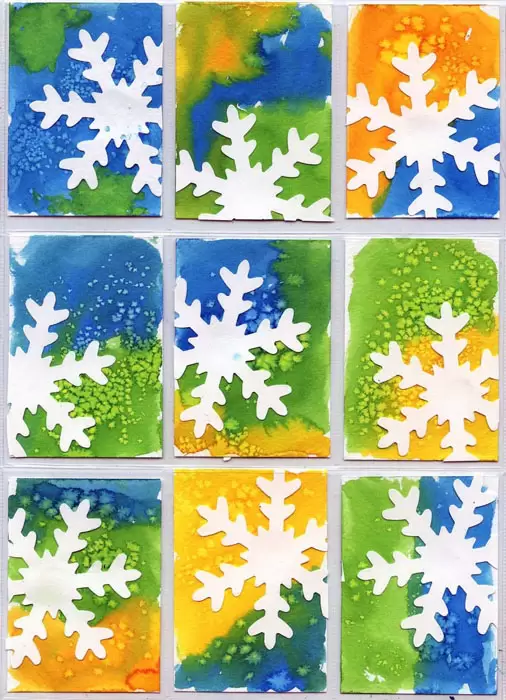
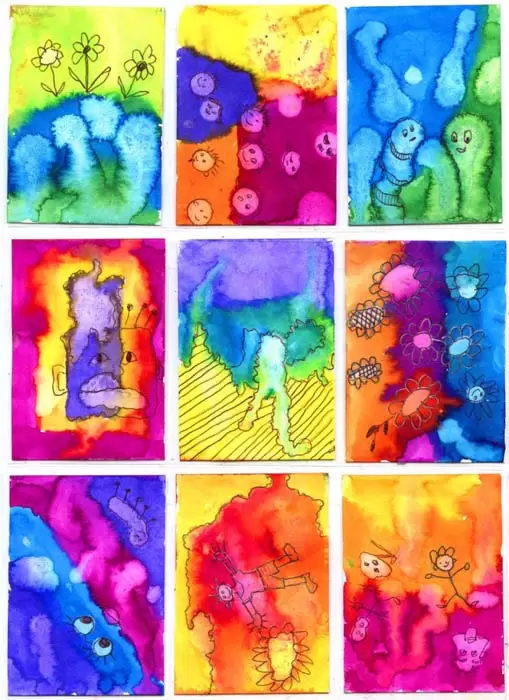
Crazy Watercolor ATCs
Lemon juice dropped on a watercolor art trading cards will make some pretty cool shapes if left to sit for a few minutes. Give it a few minutes to soak, dab away with a tissue, and some crazy shapes are left as a result.
Directions
PREP: Cut watercolor paper to the standard ATC size: 3.5″ x 2.5″.
1. Paint with liquid watercolor paint, overlapping areas so that they bleed together. NOTE: I used Dr. Ph. Martin’s paint to get the intense colors. If possible, use full strength paint to get maximum color. Let dry, or make many cards so to give the first ones time to dry.
2. Use a brush or eyedropper to place small dots of lemon juice on cards. Let sit for a couple of minutes before dabbing with a tissue. The citric acid will “bleach” out the color below it.
3. Use a black ball point pen or marker to trace the shapes that are created and turn them into whatever creatures come to mind.
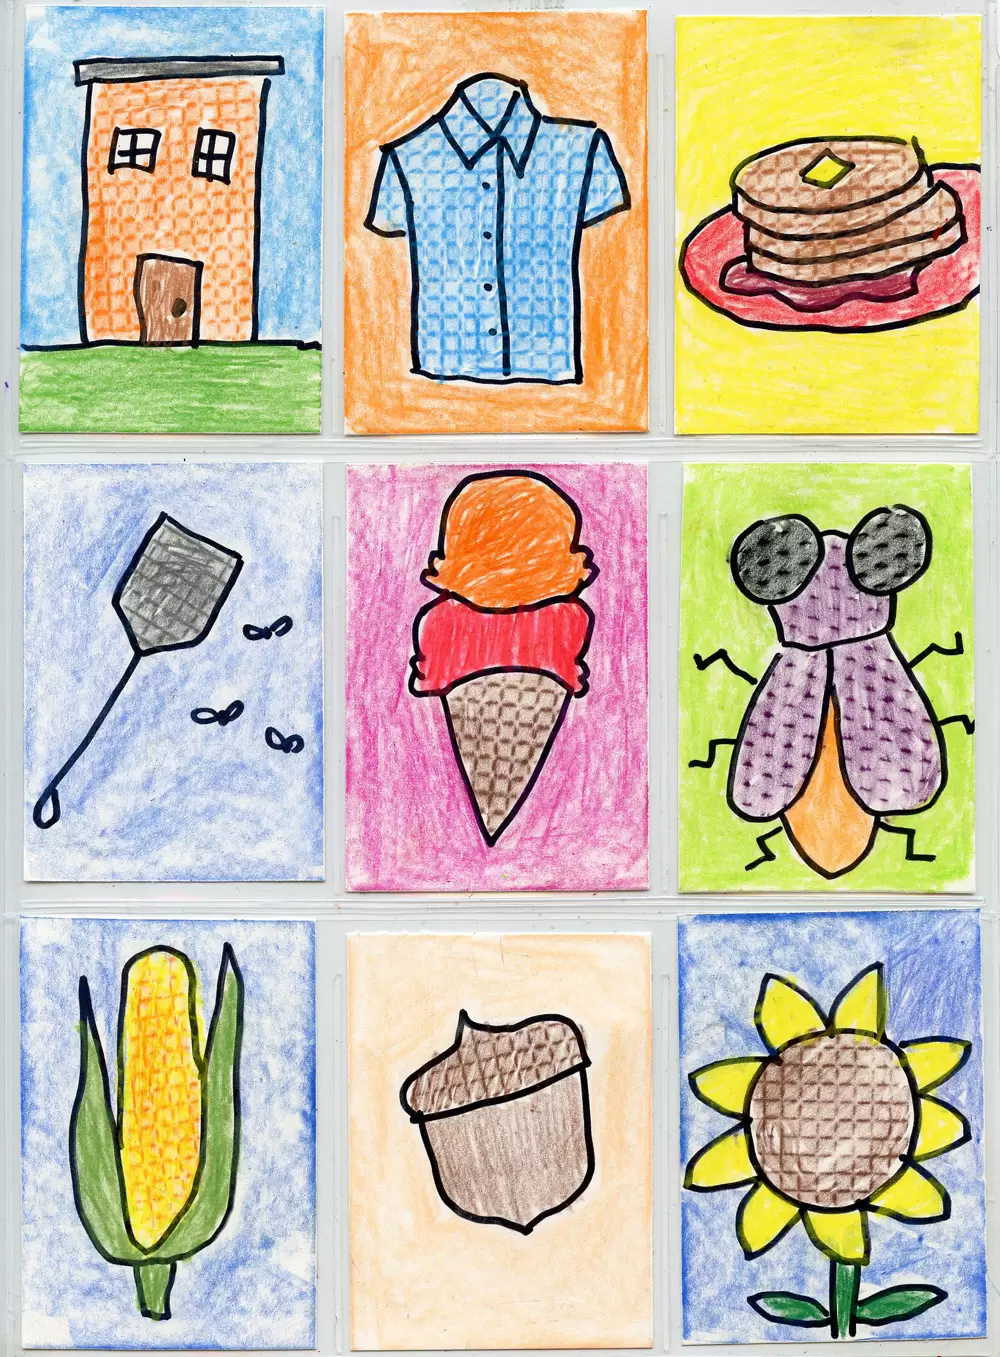
“Things that are Orange” ATCs
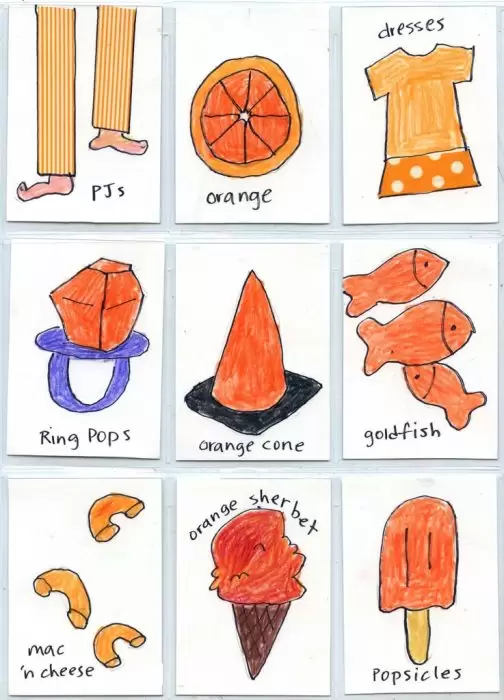
Directions
- PREP: Cut nine cards for each student, 2.5″ x 3.5″.
- Students draw things on their cards that are orange. I shared some orange Washi tape from Michaels in polka dot and striped patterns for extra inspiration.
- They trace the edges with a thin black marker.
- The shapes are colored in with pencil crayons.
Black and White Sticker Cards
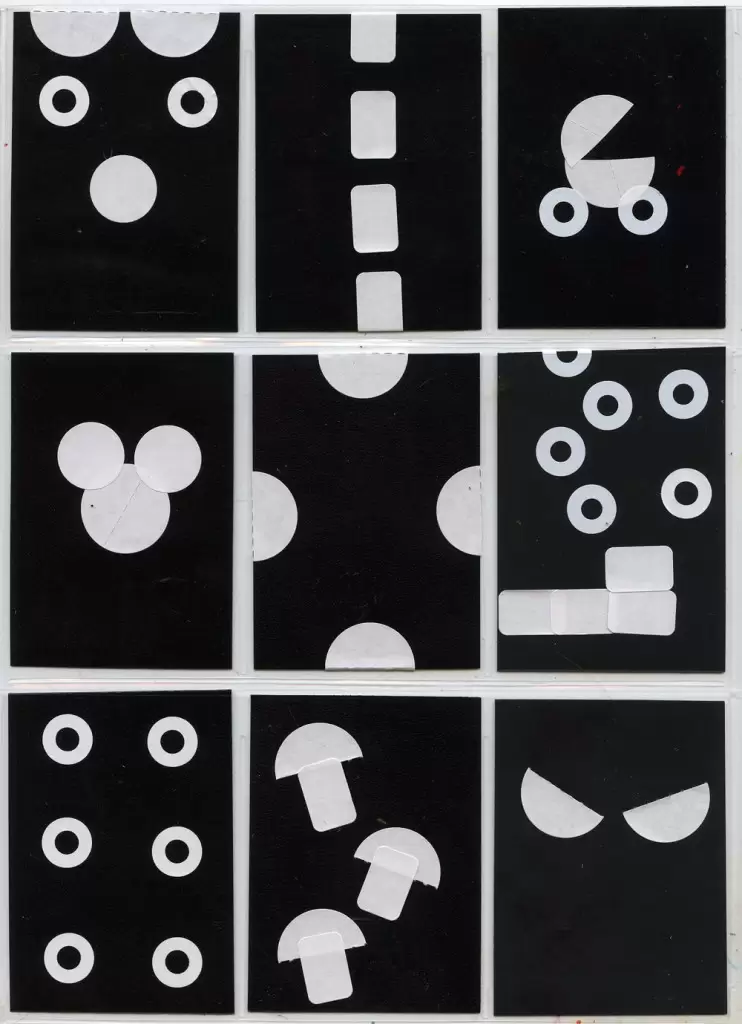
Directions
- Students take scissors to a variety of stickers to come up with some kind of image.
- The goal is to make nine different cards, all with different “things” made with just white shapes.
- The cards are placed in a trading card sleeve.
Mini School Paper ATCs
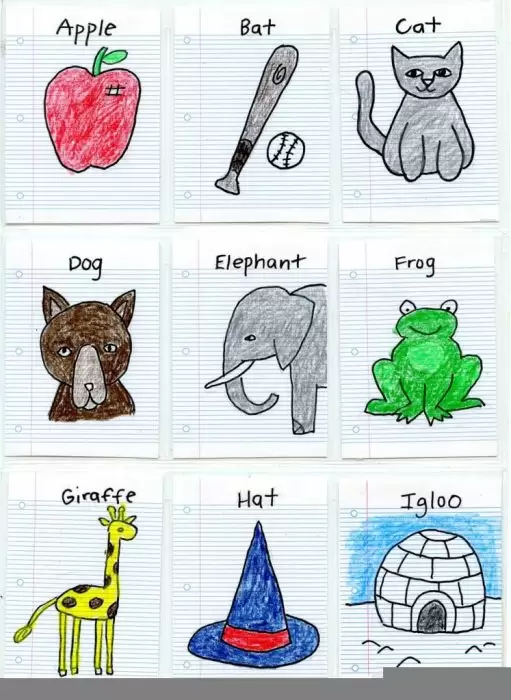
• Little Letter PDF template page
Kandinsky Circles

Kandinsky was one of the first creators of pure abstraction in modern painting. Students can have fun imitating his color style, and for a change, hope their colors “run” into each other a bit.
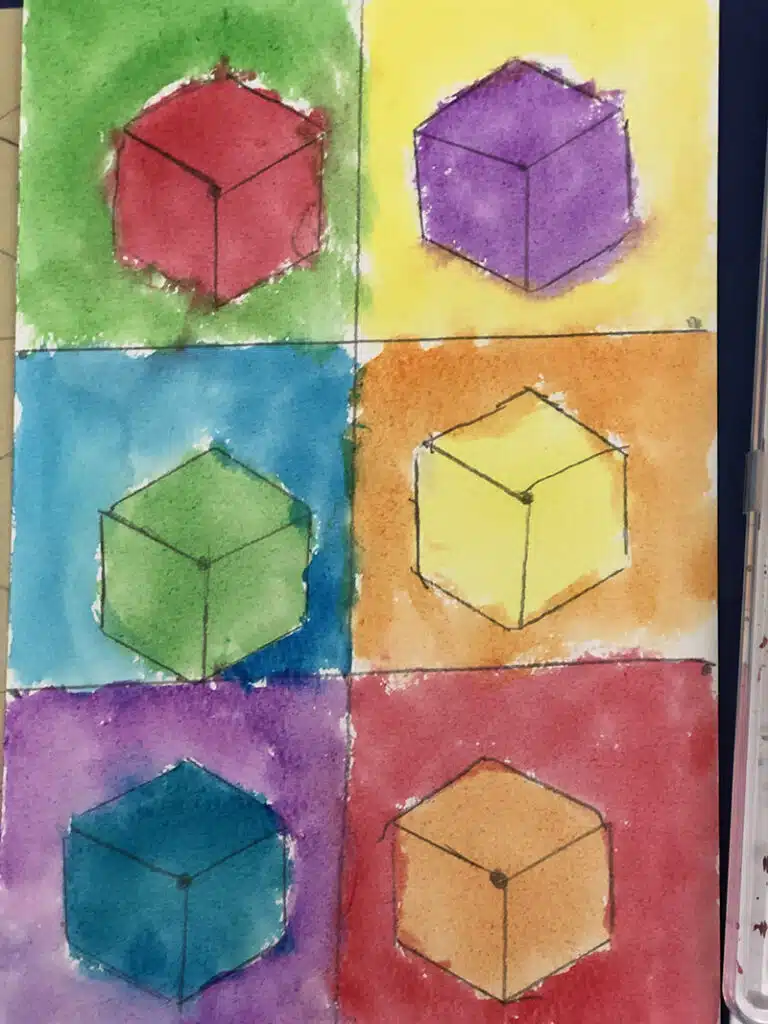
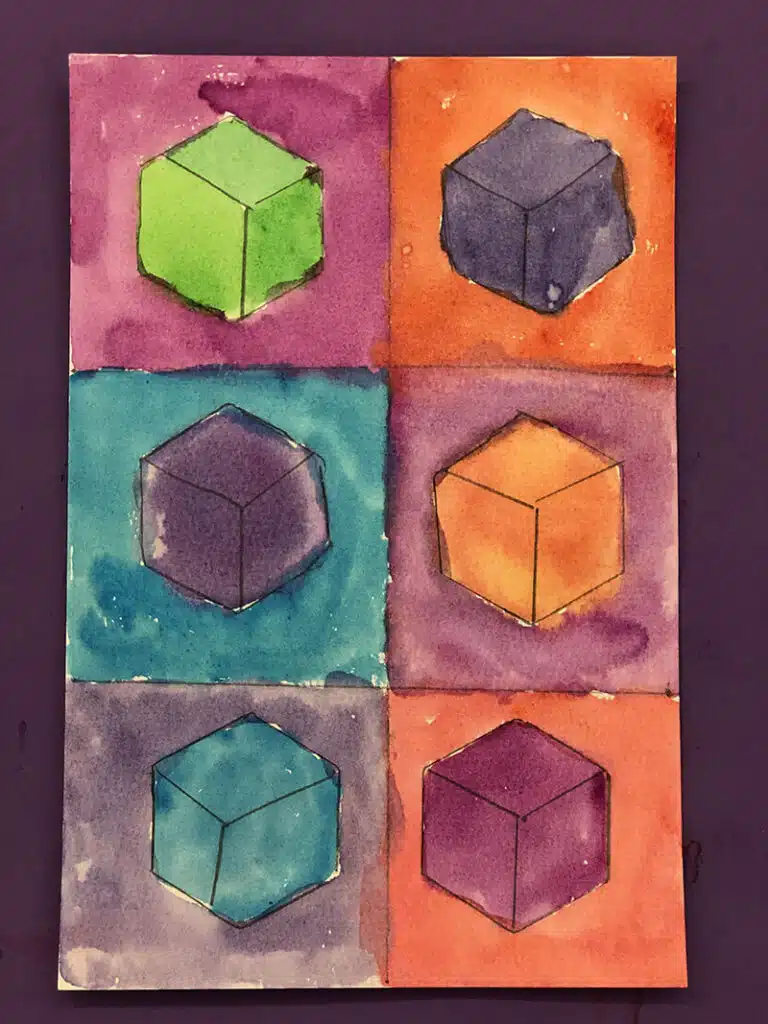
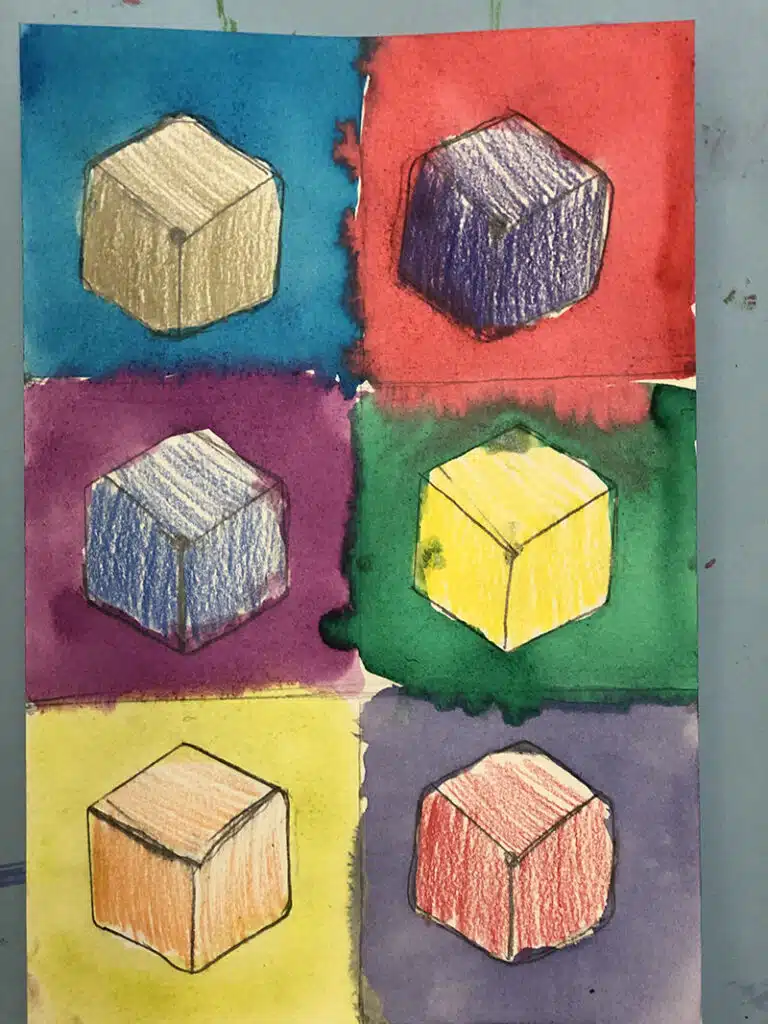
Hexagon to Cubes ATC Cards
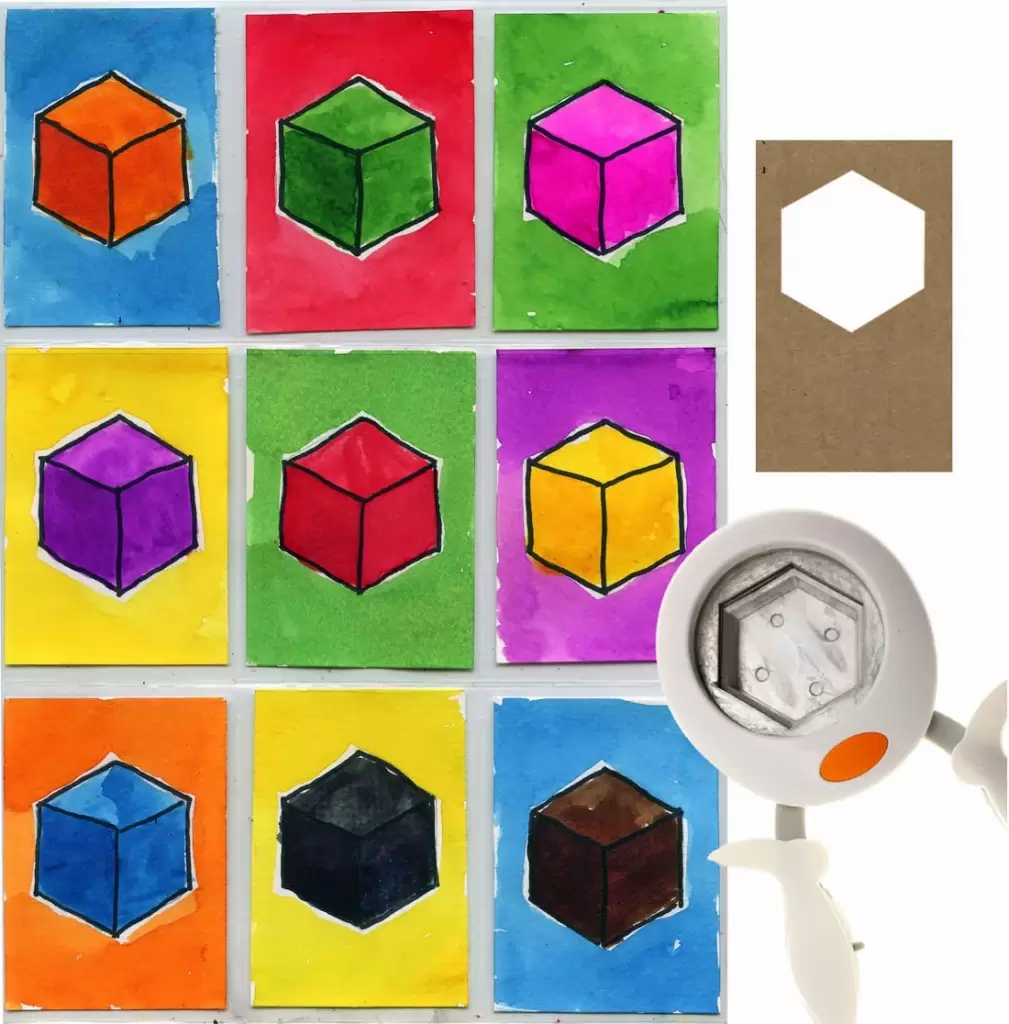
Directions
PREP: Make a 2″ hexagon stencil for each student, on 2 1/8″ x 5″ cardstock paper. Cut watercolor paper to 2.5″ x 3.5″ cards, nine for each student.
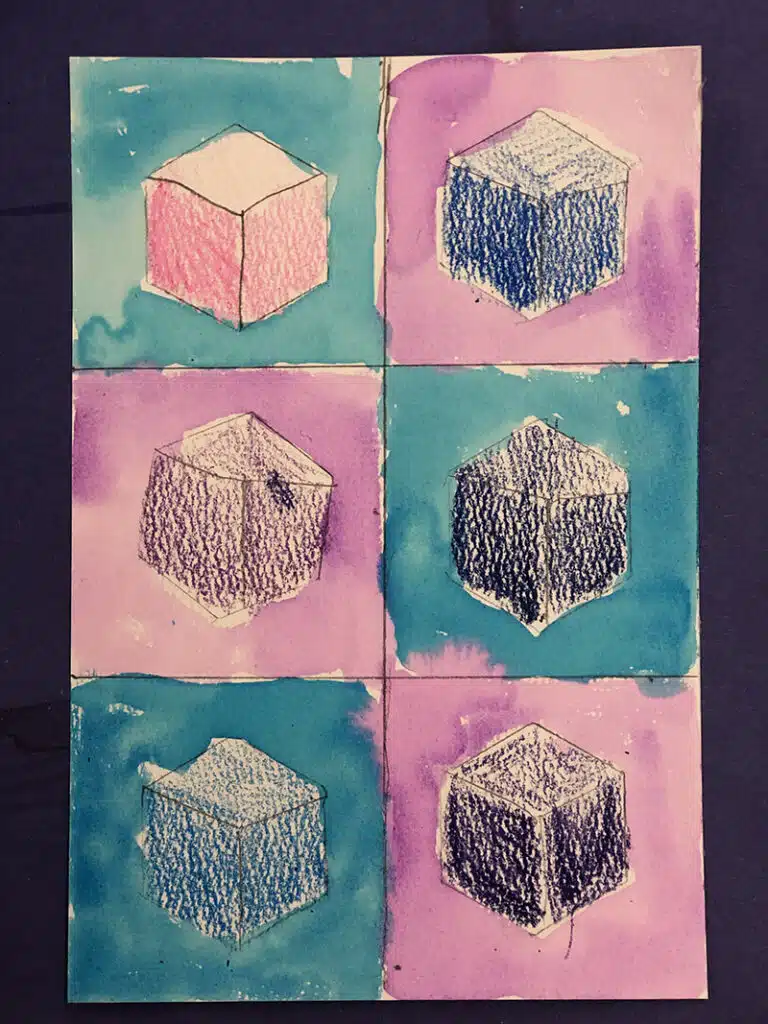
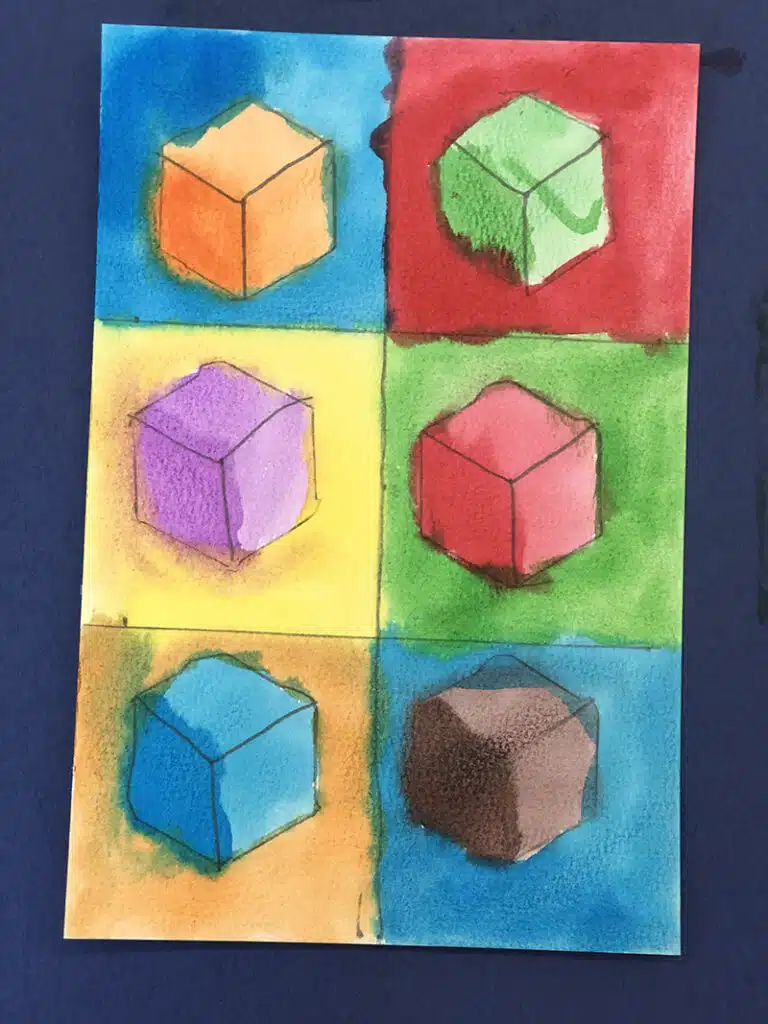
1. Students draw a hexagon in the middle of a watercolor card. A “Y” shape is drawn inside the hexagon to make the cube. The lines are traced with a permanent marker.
2. To make the cubes look like they have shadows, layers of watercolor are applied. Mine have one layer on the top, two layers on the right side, and three layers on the left. Some colors show more difference than others, but it is still a good method for making subtle shadows with watercolor.
Student Cube Art from Oregon

Weaving ATC Cards
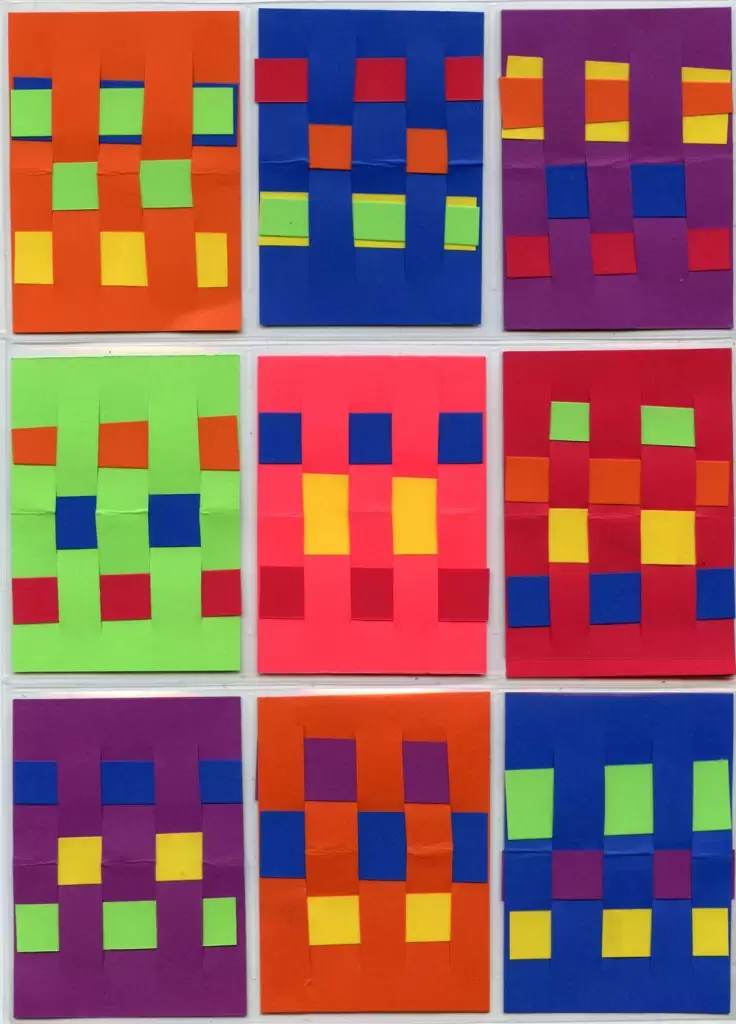
Directions
- Students fold the cards in half to measure 2.5″ x 1.75″. Using a scissors, they cut four slits on the fold, and open the card up again.
- Students weave the thin strips into their cards horizontally, hopefully getting at least 3 in each card. Those that want to add a little extra flair may add very thin strips on top of fatter ones, as shown with the yellow and orange in the top right card.
- Keep all the cards in trading card sleeves that you can find at Staples or on Amazon.
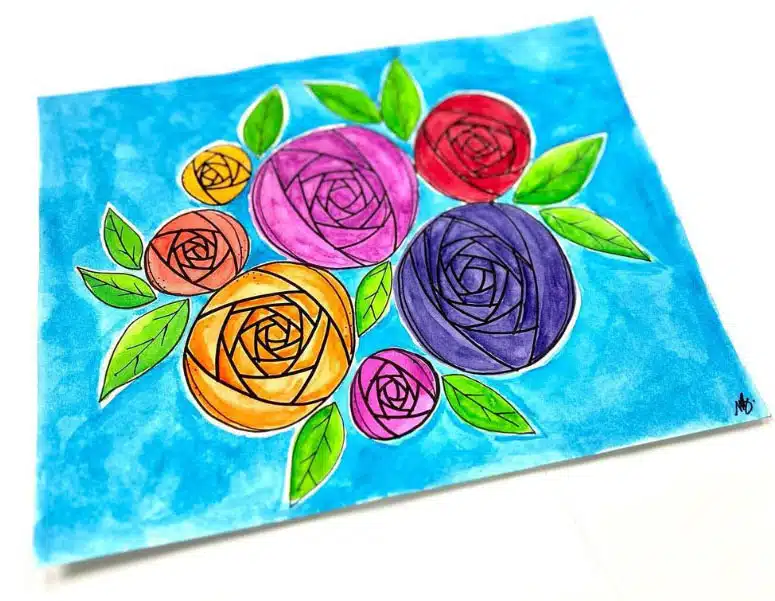
Drawing Jewels
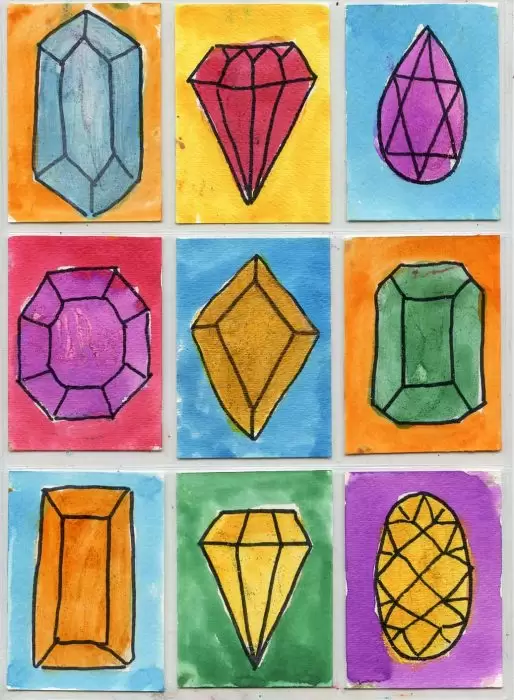
Directions
Prep: I diagrammed on the board how to draw each jewel first, mostly starting with the inside shapes and then working out. I keep seeing that most students handle drawing straight lines much more easily than curved ones, so this worked well for kinder through 4th grade.
- Students drew their jewels in pencil.
- The lines were traced with the permanent black marker.
- The jewels were painted with watercolor.
- When dry, the cards were placed in a trading card sleeve. Students needed to make 9 cards to fill their page.
Heart Stamp ATC cards
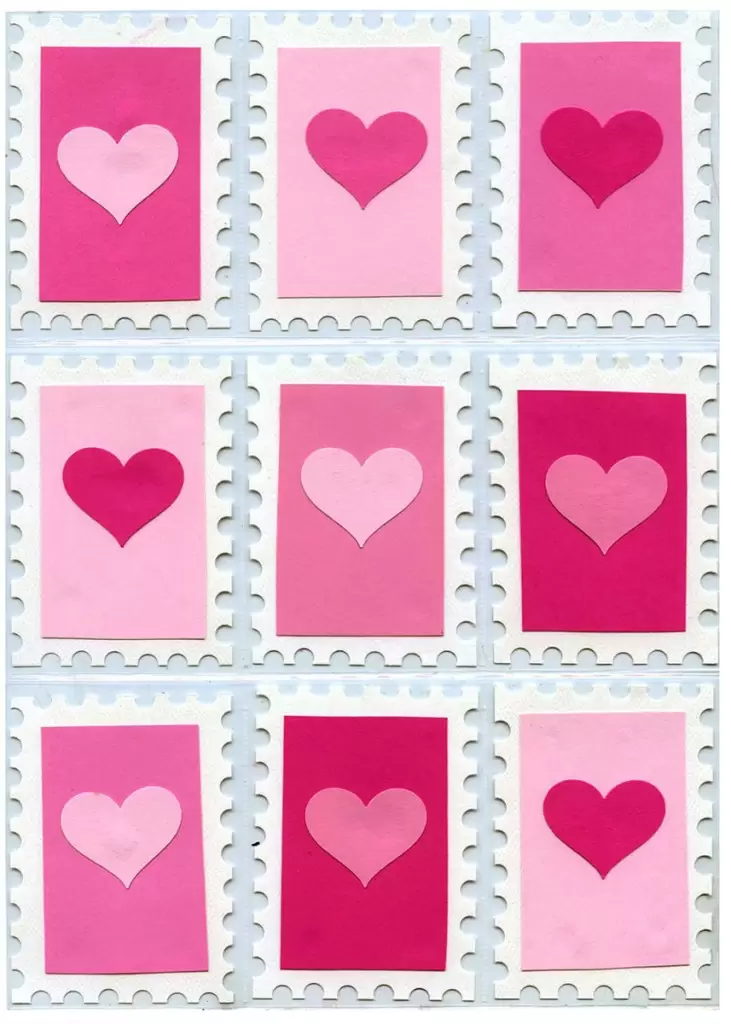
Directions
- PREP: Cut lots of white card stock to trading card size (2.5″ x 3.5″). Cut lots colored paper to 2″ x 3″ rectangles.
- Students use a hole punch to punch half of a hole out all the way around the white paper.
- A heart hole punch is used to punch out the desired heart shade to go on the colored rectangle.
- The heart is glued on the colored paper, and then both are glued onto the white “stamp”.
- Cards are stored in a plastic sleeve.
ATC Paper Quilts

ATC Texture Drawing
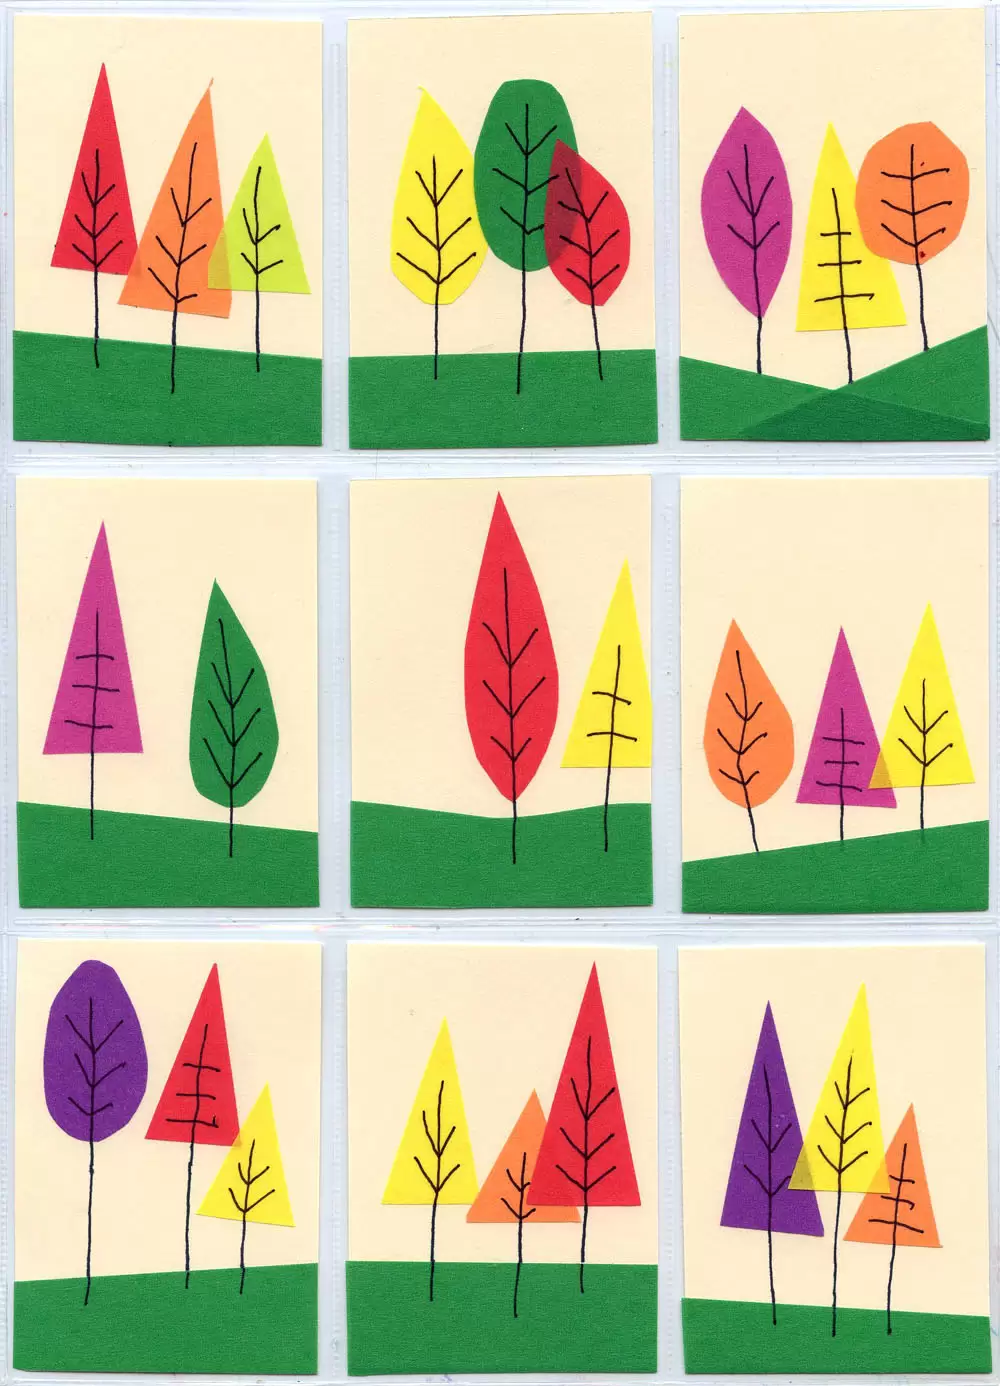
ATC Fall Trees from Tape
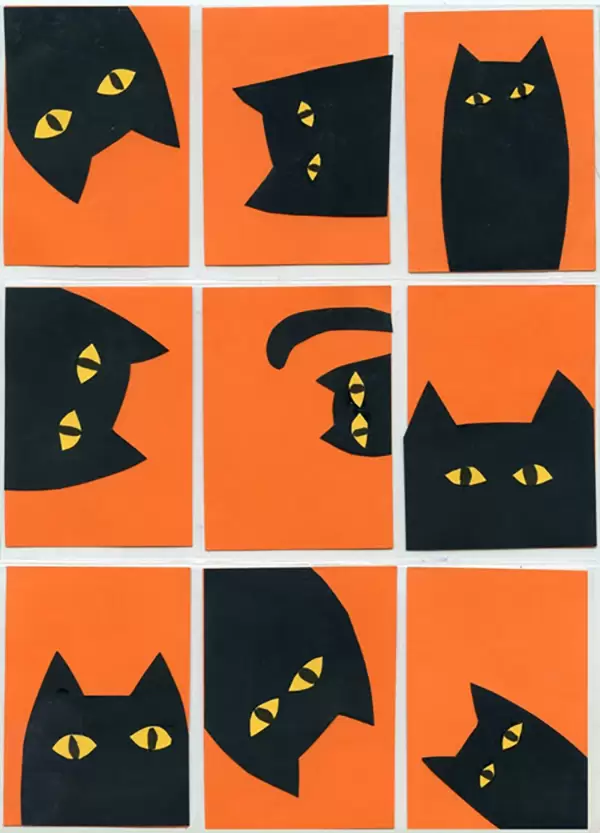
ATC Peek a Boo Cats
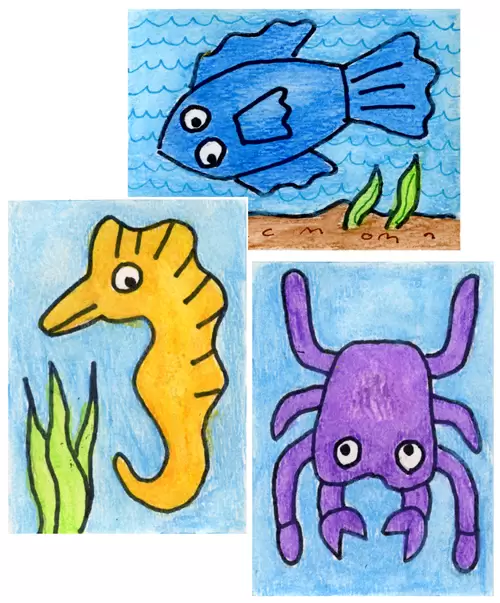
ATC Watercolor Sea Life Cards
ATC Snowflakes over Watercolor background